Commands Overview
Commands are the building blocks of the note in Canvas and support narrative charting. You will use them for both documentation and orders. Each command has been built to support a specific documentation need or workflow. Although each command in unique, they have been built using a shared framework - thus making each easy to learn and use.
Anatomy of a Command #
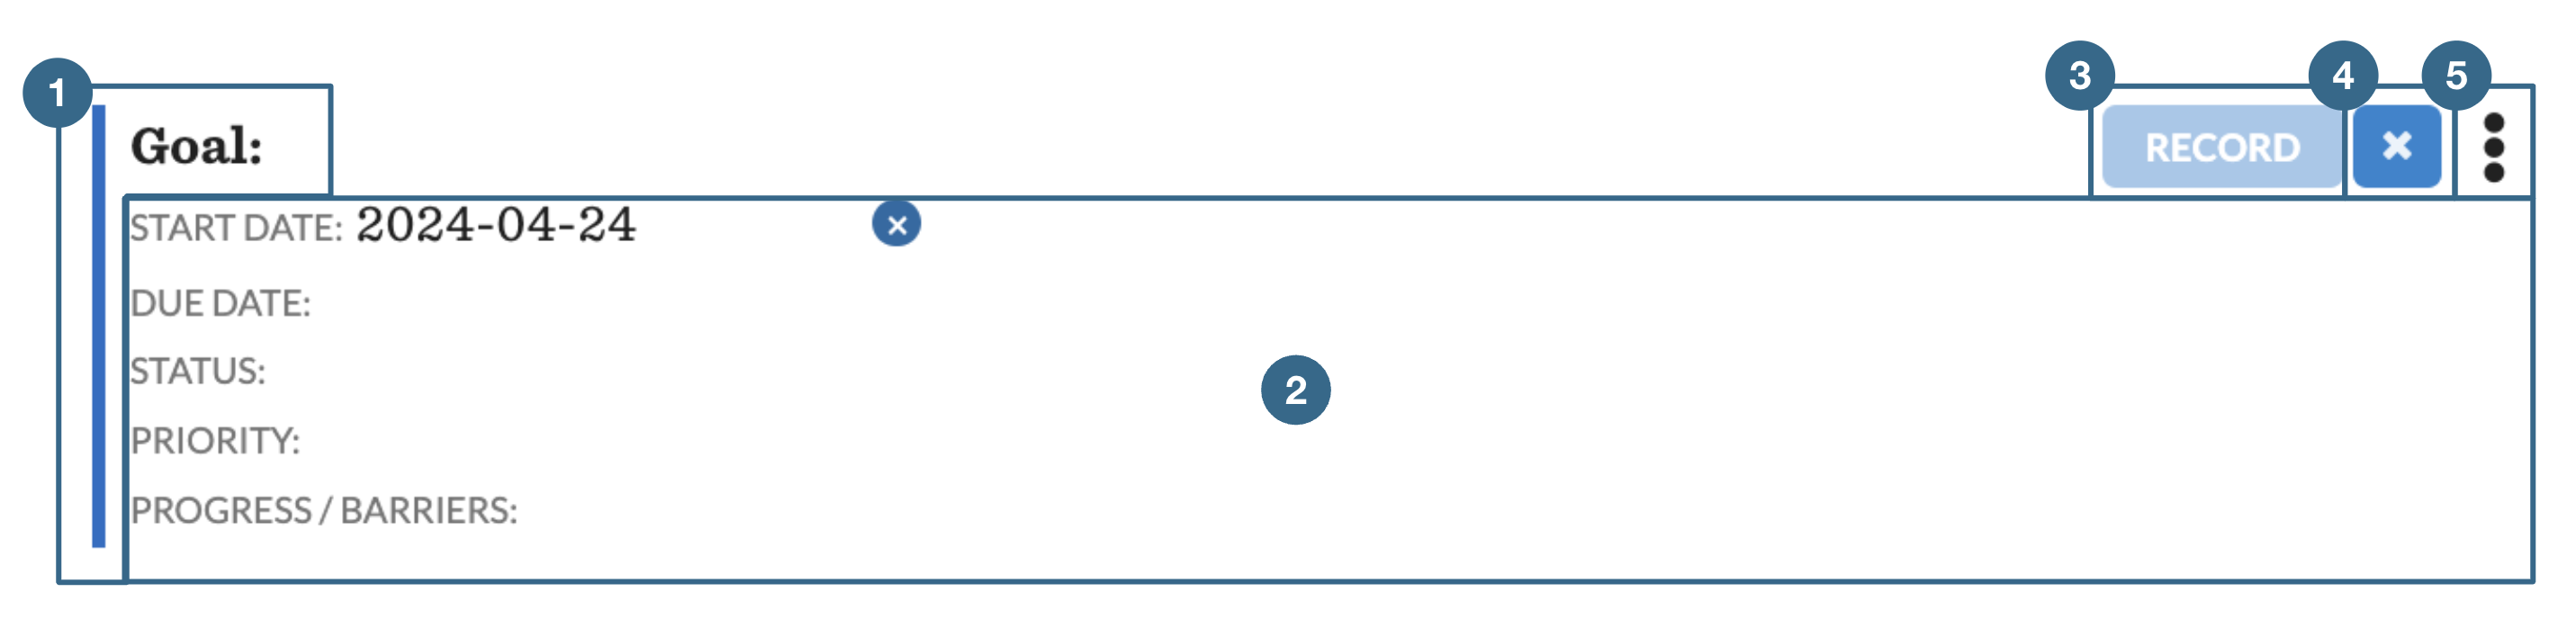
1. Command Type #
Commands have been developed to support various documentation blocks within a note. They are color coded based on where the content would live within a traditional SOAP note. Choosing the command type will then determine the form that populates.
| Subjective | Black |
| Objective | Green |
| Assessment | Orange |
| Plan | Blue |
| Procedures | Purple |
| History | Brown |
2. Form #
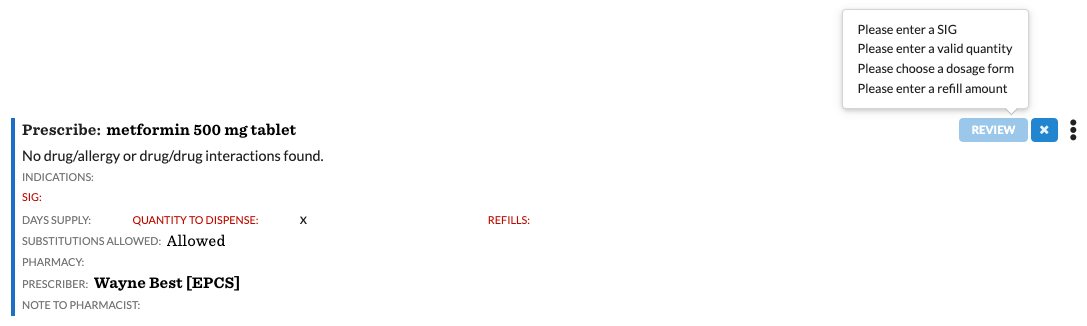
Once you select a command, a form will populate to help you capture data in a structured way. Required fields will be red on origination. Users can select the fields to enter data or navigate through them using keyboard controls (tab, arrows, and enter).
3. Commit Button #
The majority of the commands need to be committed. There are two exceptions: reason for visit and history of present illness. If the button is grayed out, it is likely due to missing required fields, permissions, or validation within the command. Hover over the button to see a tooltip with guidance on what is needed in order to successfully record the command.
4. Delete Button #
An uncommitted command can be deleted from the note by clicking the X button
5. Triple Dot Menu #
Additional actions can be found in the triple dot menu. The actions vary based on the command, its contents, and current status.
- Carry Forward: Carry forward will pull in the last recorded response for the patient across all users. It is available before the commmand is committed. It has been disabled for RFV and HPI, as they are never committed. It may also be disabled for commands where the command is meant to reference patient specific data.
- Print: Print will open your browsers printing center. You can use this option and save to PDF if you need to save a copy of the command to you hard drive. Most commands follow a general template for printing. The templates for orders will vary. Printing is available both before committing the command and after, but may only be an option if there is content within the command.
- Audit History: The audit history currently includes three actions: originating, committing, and entering a commmand in error. The timestamp will always show for origination. We do not currently capture a timestamp within the model for committing a command or entering it in error; however, we do capture last edited. As as result we can deduce when the command has been committed, until it is subsequently entered in error(EIE) - at which point the last edited will be used for the EIE action. The audit modal is available before and after committing the command.
- Create or Update Automation: Create new or add the command to existing automations. This action is available before committing commands and after so that you can add command in various states of completion. Read more about creating automations here
- Enter in Error: After a command has been committed, you can remove it from a note by selecting Enter in Error. The command will still be present in the note for auditability purposes but will be formatted with a strikethrough. External print templates may not include commands that have been entered-in-error.
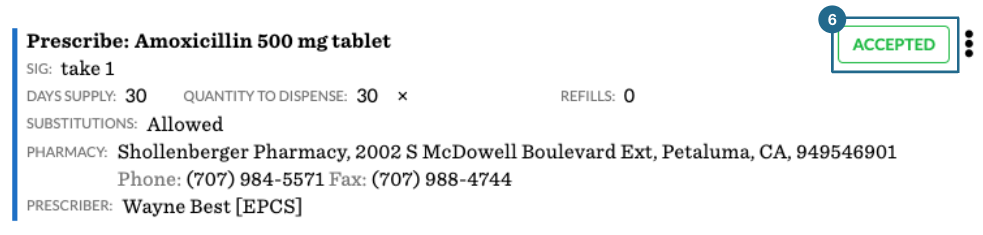
6. Status #
We have outbound interfaces for labs via Health Gorilla and prescriptions via Surescripts. The status badge will display the current status of the outbound message.
Adding Commands #
To add a command to a note, simply start typing what you would like to document. The commands all use natural language to make them easy to find. Abbreviations that match keywords can also be used (e.g. DC for Discontinue will match the stop medication command).
Commands can also be added through automations.