How to add additional fields to the scheduling appointment fields
This guide explains how to add additional fields that will appear when scheduling an appointment. With this, you can define custom fields, and the information will be stored as appointments metadata.
What you’ll learn: #
- Use the
AppointmentMetadataCreateFormeffect to display additional fields when scheduling an appointment. - Use the
FormFieldclass to create fields
Appointment Metadata Create form plugin #
1. FormField #
To create the form, we need to specify which items will be included. For this, we use the FormField class, where we can define our inputs and their attributes.
from canvas_sdk.effects.appointments_metadata import FormField, InputType

FormField(
    key='state',
    label='State',
    type=InputType.TEXT,
    required=False,
    editable=True,
    value="CA"
),
2. AppointmentMetadataCreateFormEffect #
The next step is to add these fields to the effect so they can be used to build the form.
from canvas_sdk.effects.appointments_metadata import AppointmentsMetadataCreateFormEffect, FormField, InputType

AppointmentsMetadataCreateFormEffect(form_fields=[
    FormField(
        key='state',
        label='State',
        type=InputType.TEXT,
        required=False,
        editable=True,
        value="CA"
    ),
    ...,
])
3. The plugin #
Here’s an example of a complete plugin showcasing the different input types.
from canvas_sdk.effects import Effect
from canvas_sdk.effects.appointments_metadata import AppointmentsMetadataCreateFormEffect, InputType, FormField
from canvas_sdk.events import EventType
from canvas_sdk.handlers import BaseHandler


# Inherit from BaseHandler to properly get registered for events
class Protocol(BaseHandler):
    RESPONDS_TO = EventType.Name(EventType.APPOINTMENT__FORM__GET_ADDITIONAL_FIELDS)

    def compute(self) -> list[Effect]:
        form = AppointmentsMetadataCreateFormEffect(form_fields=[
            FormField(
                key='state',
                label='State',
                type=InputType.TEXT,
                required=False,
                editable=True,
            ),
            FormField(
                key='occupation',
                label='Occupation',
                type=InputType.SELECT,
                required=False,
                editable=True,
                options=["Engineer", "Teacher", "Other"]
            )
        ])

        return [form.apply()]
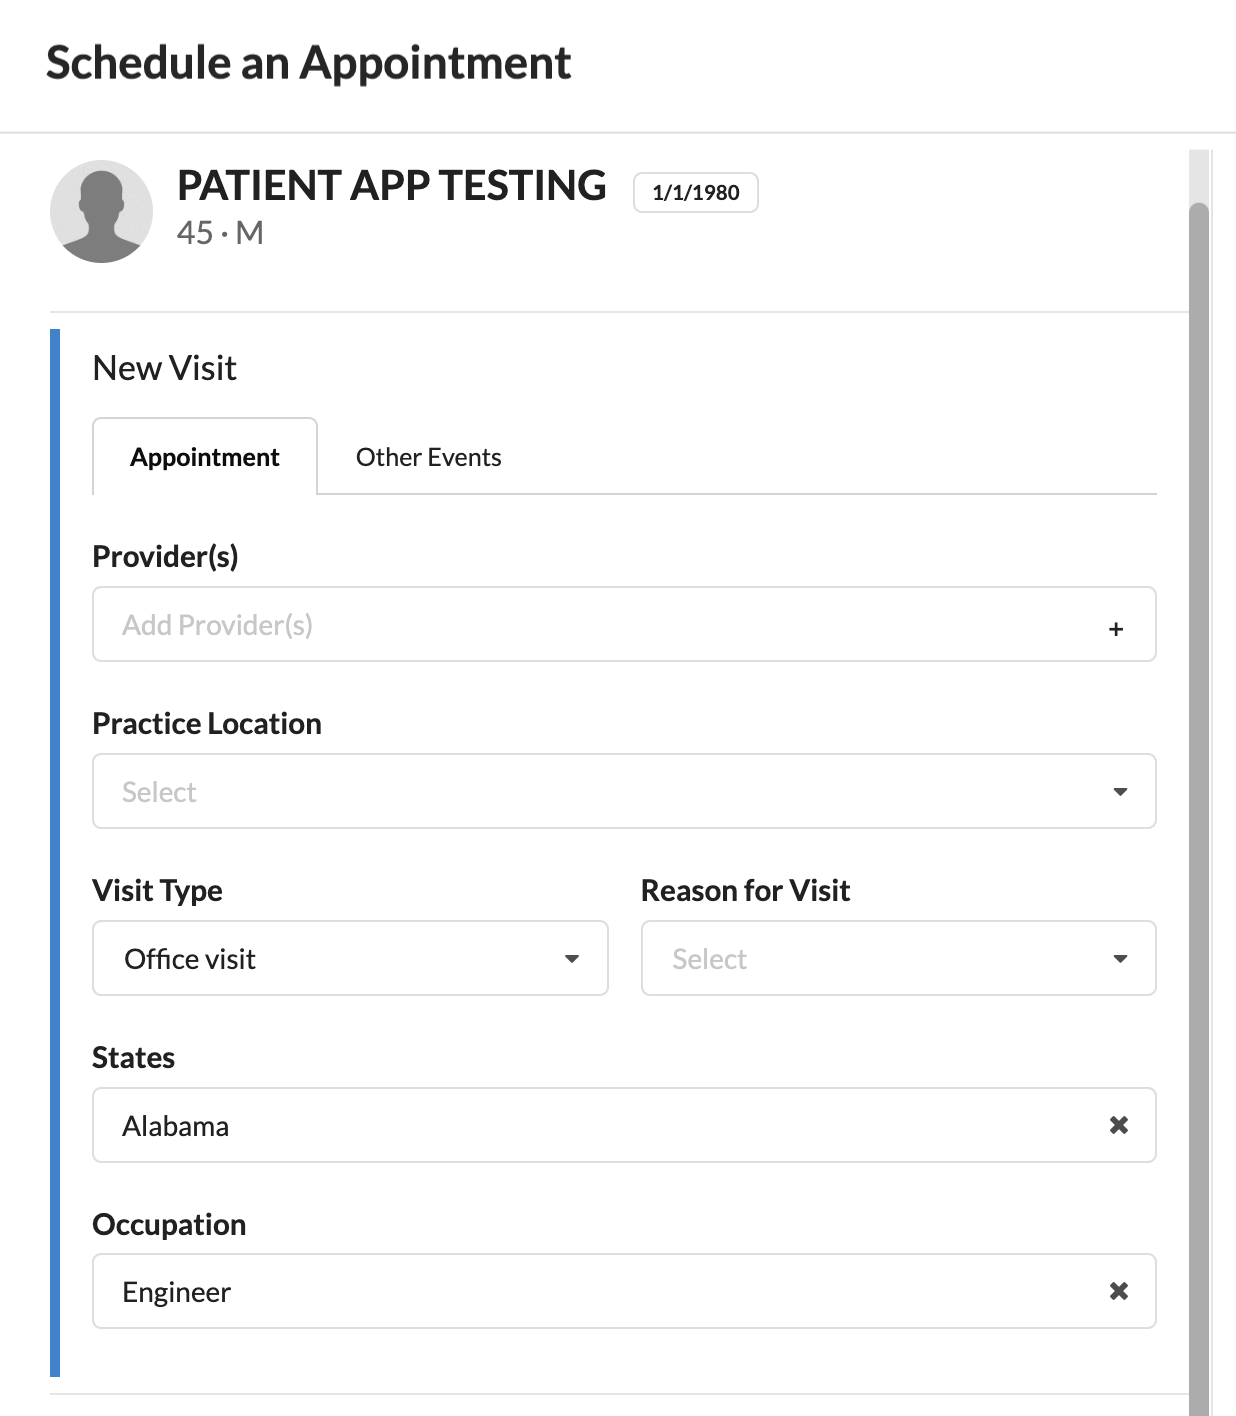
4. The Output #
Below, you can see how it will appear in the app — these fields will be stored as appointments metadata.