Embedding a SMART app into Canvas
Canvas’ FHIR API supports the SMART launch sequence, and the Canvas SDK allows you to embed html content within the Canvas EMR. The combination of these capabilities is a frictionless experience when embedding a SMART app into Canvas. This example will show you how to register a SMART app’s credentials and create an application to launch it from within a patient’s chart.
In this guide you will learn how to: #
- Configure credentials for a public OAuth application.
- Create an application to initiate the SMART launch sequence.
- Use application launch context to help form the SMART launch URL parameters.
What is a SMART app? #
SMART on FHIR applications adhere to a standards-based approach to authentication, authorization, and data access with the goal of being portable across EMR installations and vendors. Because SMART apps limit themselves to standards based data, the logic can be agnostic to the EMR it is running against. Vendor to vendor, site to site, FHIR is FHIR, that’s how it works, right?
Where can I get a SMART app? #
We’ve provided an example SMART app here. You can fork it and customize, or just use ours as-is. We use GitHub pages to host it at https://canvas-medical.github.io/example-smart-on-fhir-app/. Please ensure the client id listed in launch.html matches the client id for the credentials you configure in the next step.
Configuring credentials #
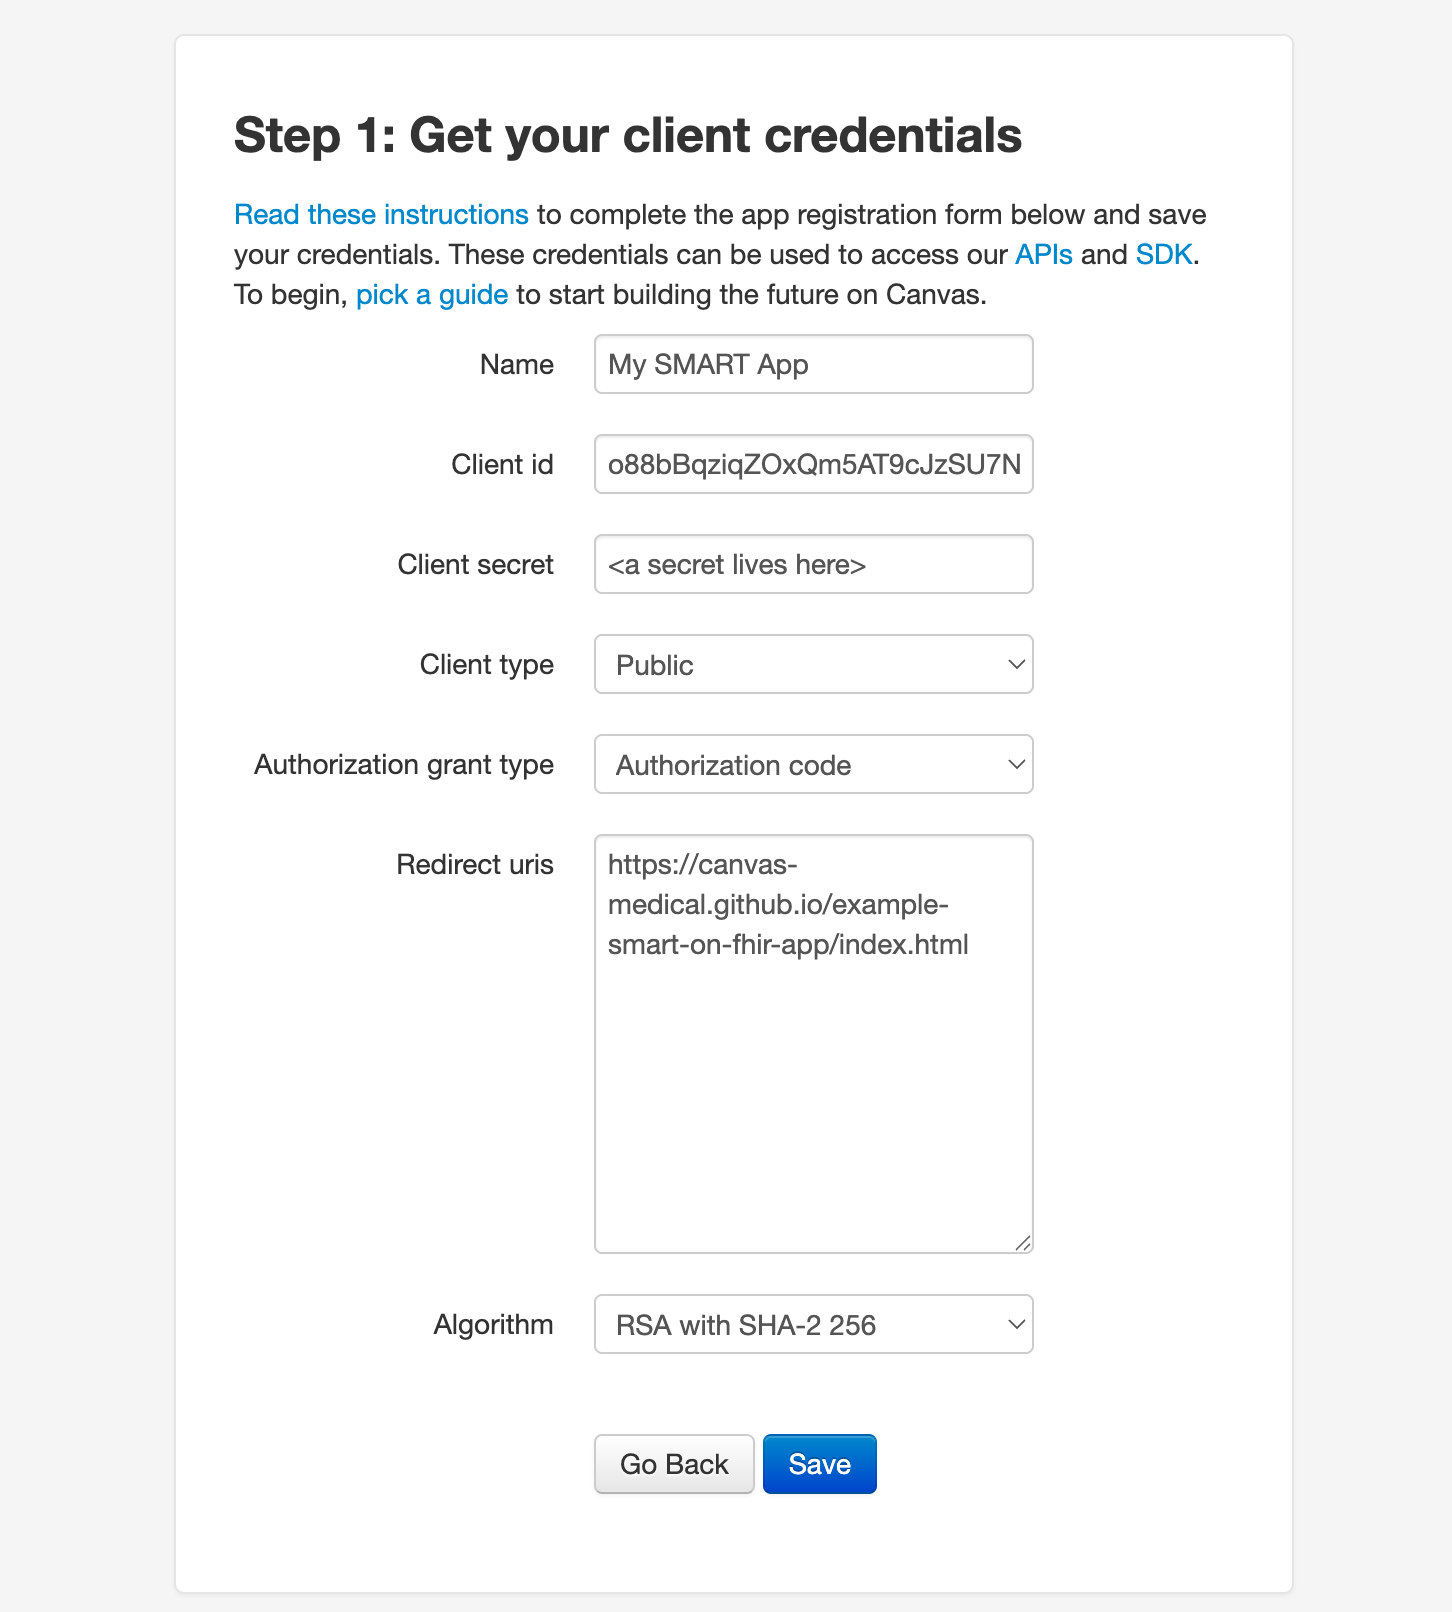
The first step to embedding a SMART application is to configure OAuth credentials for it to use. Navigate to <YOUR_CANVAS_URL>/auth/applications/register/ and choose Public client type, Authorization code grant type, the RSA algorithm, and set the redirect uri for your SMART application.
Creating an application #
We encourage you to read our more comprehensive guide on creating applications via the Canvas SDK, but we can provide an abridged version here.
Using the Canvas CLI, create an application from a template using canvas init application. After providing a name, the Canvas CLI will create a directory with your application inside it.
dev@canvas:plugins$ canvas init application
  [1/1] project_name (My Cool Application): My Smart App
Project created in /Users/dev/src/plugins/my_smart_app

dev@canvas:plugins$ tree my_smart_app/
my_smart_app/
├── CANVAS_MANIFEST.json
├── README.md
├── applications
│   ├── __init__.py
│   └── my_application.py
└── assets
    └── python-logo.png

3 directories, 5 files
There are two files we’ll want to visit for changes: CANVAS_MANIFEST.json and applications/my_application.py.
Configuring the manifest file #
In order to set the same-origin policy for the iframe our SMART app will be embedded into, we need to make sure the url where the SMART app is hosted is listed in the url_permissions section of the manifest, and the ALLOW_SAME_ORIGIN permission is requested.
    "url_permissions": [
        {
            "url": "https://canvas-medical.github.io",
            "permissions": ["ALLOW_SAME_ORIGIN"]
        }
    ],
We also want to change the application scope from the default “global” setting to “patient specific”:
    "components": {
        "applications": [
            {
                ...
                "scope": "patient_specific",
            }
        ],
    },
Setting the SMART launch URL #
The SMART authorization dance begins with the SMART app’s launch URL. The parameters present on this URL set the wheels in motion. The launch URL is loaded in an iframe, and javascript immediately reads the iss param in order to probe the FHIR API’s CapabilityStatement for the EMR’s Authorize endpoint, which the iframe is then redirected to, with its own load of URL parameters in tow.
We can set this initial URL and launch params in the on_open method found in applications/my_application.py. This is the code that is invoked when a user clicks the application’s launch icon.
import json

from base64 import b64encode
from urllib.parse import urlencode

from canvas_sdk.effects import Effect
from canvas_sdk.effects.launch_modal import LaunchModalEffect
from canvas_sdk.handlers.application import Application


class MyApplication(Application):

    def on_open(self) -> Effect:
        launch_context = {
            "patient": self.context["patient"]["id"]
        }
        encoded_launch_context = b64encode(json.dumps(launch_context).encode()).decode()

        launch_params = {
            "iss": f"https://fumage-{self.environment['CUSTOMER_IDENTIFIER']}.canvasmedical.com",
            "launch": encoded_launch_context
        }
        encoded_launch_params = urlencode(launch_params)

        return LaunchModalEffect(
            url=f"https://canvas-medical.github.io/example-smart-on-fhir-app/launch.html?{encoded_launch_params}",
            target=LaunchModalEffect.TargetType.RIGHT_CHART_PANE,
        ).apply()
That’s all the plugin work we need to do in order to create a launcher for the SMART application. Install the plugin into your Canvas instance, navigate to a patient’s chart, and choose your application from the launcher.
Executing the launch sequence #
Upon launching your application, the SMART app will need the user to sign off on the access token it will receive to access the FHIR API on behalf of the logged in user.
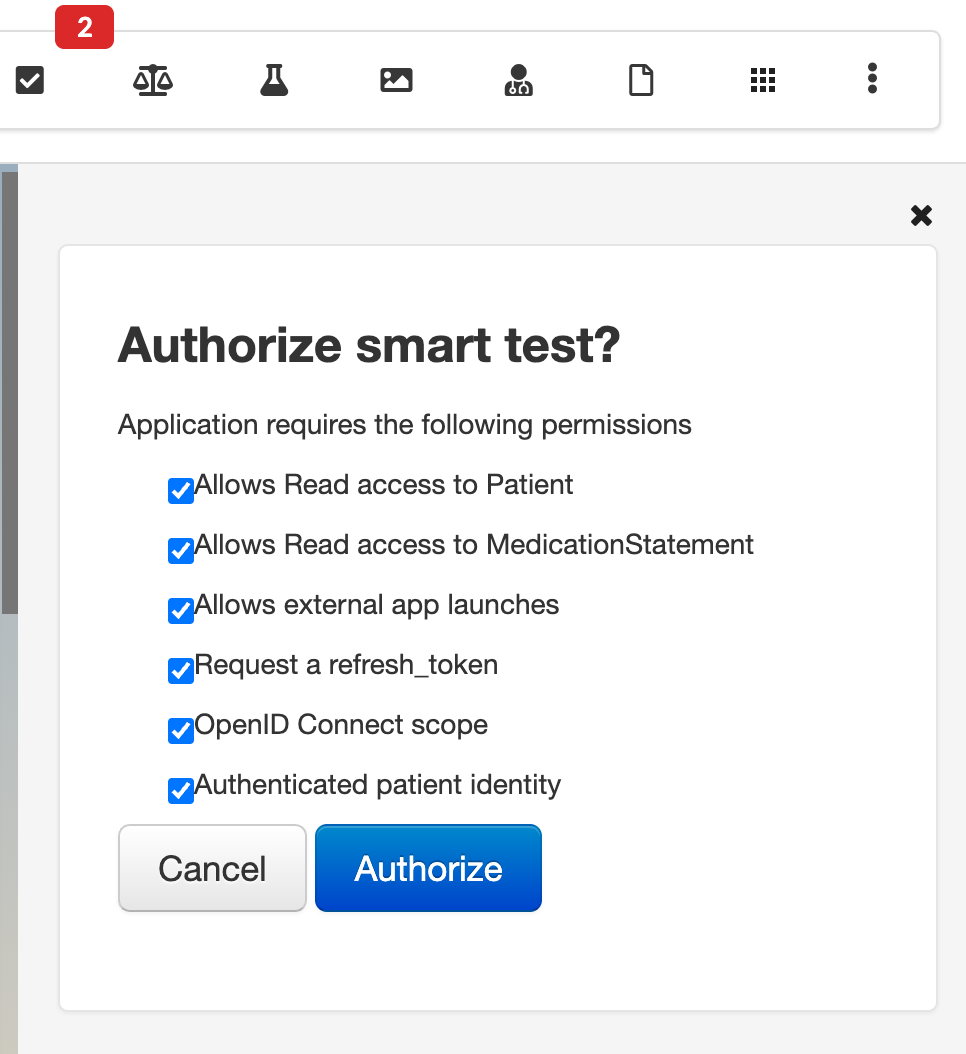
The page you’re seeing in the image is served by Canvas. This page is asking for the logged in user’s consent to sending the SMART app a token which can access the FHIR API on the user’s behalf. Clicking Authorize will redirect the iframe to the URL specified in the OAuth client’s configuration with several params, most critically the API access token.
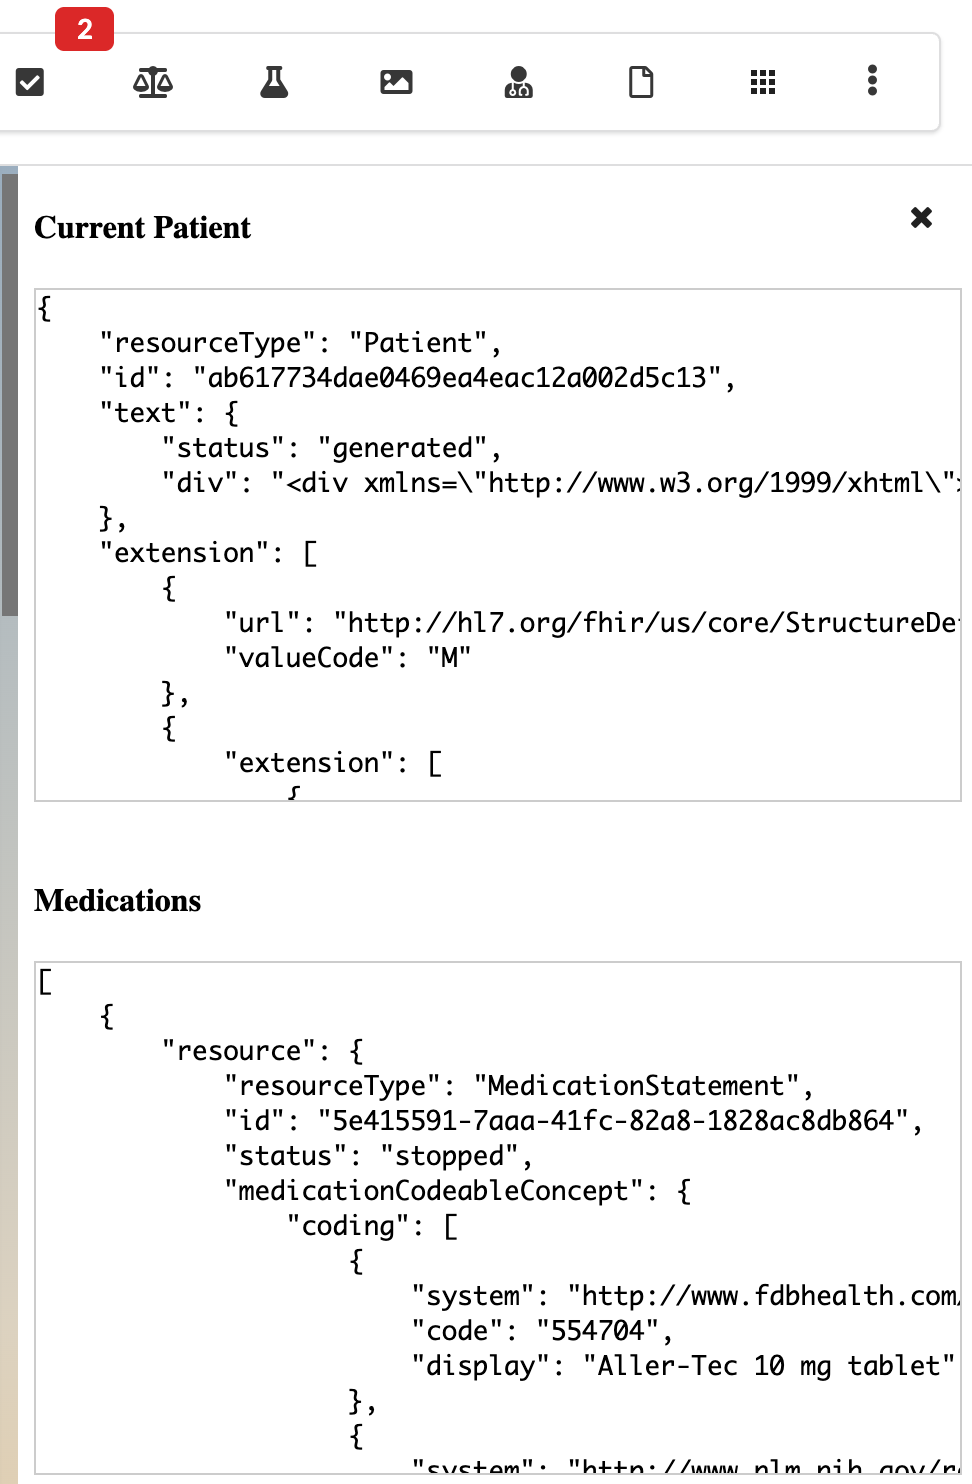
With the SMART app now in possession of a valid API access token, the application can function with access to all the data it is authorized to retrieve from the FHIR API. The example SMART app we’ve been working with simply shows the raw FHIR records retrieved for the patient.
If you want to update the example SMART app to authorize additional data access from the FHIR API, you’ll need to add those endpoints to the scope values in launch.html, or wherever your authorize method is called:
    <script>
        FHIR.oauth2.authorize({
            ...
            // The scopes that you request from the EHR. In this case we want to:
            scope: "patient/Patient.read patient/MedicationStatement.read patient/Goal.read patient/DocumentReference.read launch offline_access openid fhirUser",
            ...
        });
    </script>
For a more comprehensive list of available FHIR scopes, visit the API docs.
A more flexible alternative #
If you’re looking to provide your users a more native experience without requiring the intricate authorization dance SMART prescribes, you’re already pretty close just by going through the exercise above! While we created an embedded iframe of remote-hosted content, the Canvas SDK also allows you to define HTTP endpoints which can also be the targets of the iframes. This allows your plugins to host dynamically rendered HTML, CSS, Javascript, and more, with no external hosting required! You can take advantage of the built-in session authentication for access control (no separate logins or authorizations for your users), and you have direct access to the EMR database through the Canvas SDK’s data module. Caching and websockets help you provide modern experiences, while the effects module ensures you can write new data back into Canvas as needed.
The Canvas SDK allows you to deploy full web applications within the EMR, colocating your code with the data it needs to function, and without requiring any additional infrastructure. Want to explore further? Join us in our developer community and say hello!